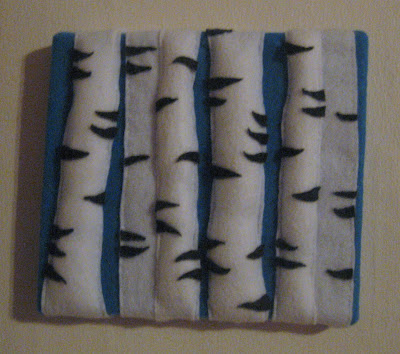
i decided to take it 3d. it was fun & really quite easy.
what you need:
1 large piece of dense fabric or felt, 11" x 13" in blue or background color of choice
2 felt sheets (9" x 11") - white, charcoal
thread (black, white)
batting
scissors
needle
staple gun
stretch frames (8" x 9")
instructions:
1. cut 6 varying birch trunks - between 3/4" to 1.5"
2. cut small arching triangles
3. using a straight stitch, attach triangles randomly on each birch trunk (you'll only need to do one side of trunks 1 & 2) with black thread
4. pin each detailed trunk on background fabric (should be centered on the fabric with 1.75"+ on the right & left side of the fabric, branches should extend from top to bottom)
5. using a straight stitch, attach 2 or 3 background trunks tight to background piece with white thread
6. stitch the left side of trunk a
7. leaving some space for batting, stitch the right side of trunk a. for example - if trunk a is 3/4" wide, stitch a 1/2" from left side. leave top & bottom of trunk open
8. continue through trunk d
9. fill trunks a-d with batting (i used a pencil end to push it through)
10. assemble your stretching frame
11. wrap felt collage around frame. use the staple gun (one side at a time) to attach.

helpful tips:
1. make sure to have your background fabric extends well beyond your stretch bars when assembled. my felt had to be attached at the outside of frame instead of back.
2. you could you an adhesive to secure the charcoal details before sewing.


1 comment:
that's awesome.
Post a Comment